Available Meteorological modellings
Note
In this section, you may find the different steps for launching the possible meteorological modellings.
Creating or selecting a simulation
Before selecting the modelling’s type, it is required to create a new simulation by clicking on the symbol New scenario. If you need to open a former simulation, on the dashboard, select the simulation on the simulations’ list, and clikc on the symbol Open scenario. If you have to copy a scenario, click on the symbol Copy scenario, and for reloading a scenario, click on the double arrow.
Once your scenario is created (or opened), you are redirected on a page with two categories, one called SITE, the other one called METEO.
On the SITE tab, you can set-up your simulation.
To define a site, you can either select a predefined site from a previous scenario, or choose the USER mode, in which you must define the site by clicking on the blue rectangle adjacent to the X and Y coordinate fields. Then, select your simulation area with your mouse by drawing a rectangle within the bigger blue rectangle located on the map. Validate the perimeter to proceed.
You are also able to define the start and end date of your simulation. To quickly get results, defining a six-hour-period is recommended.
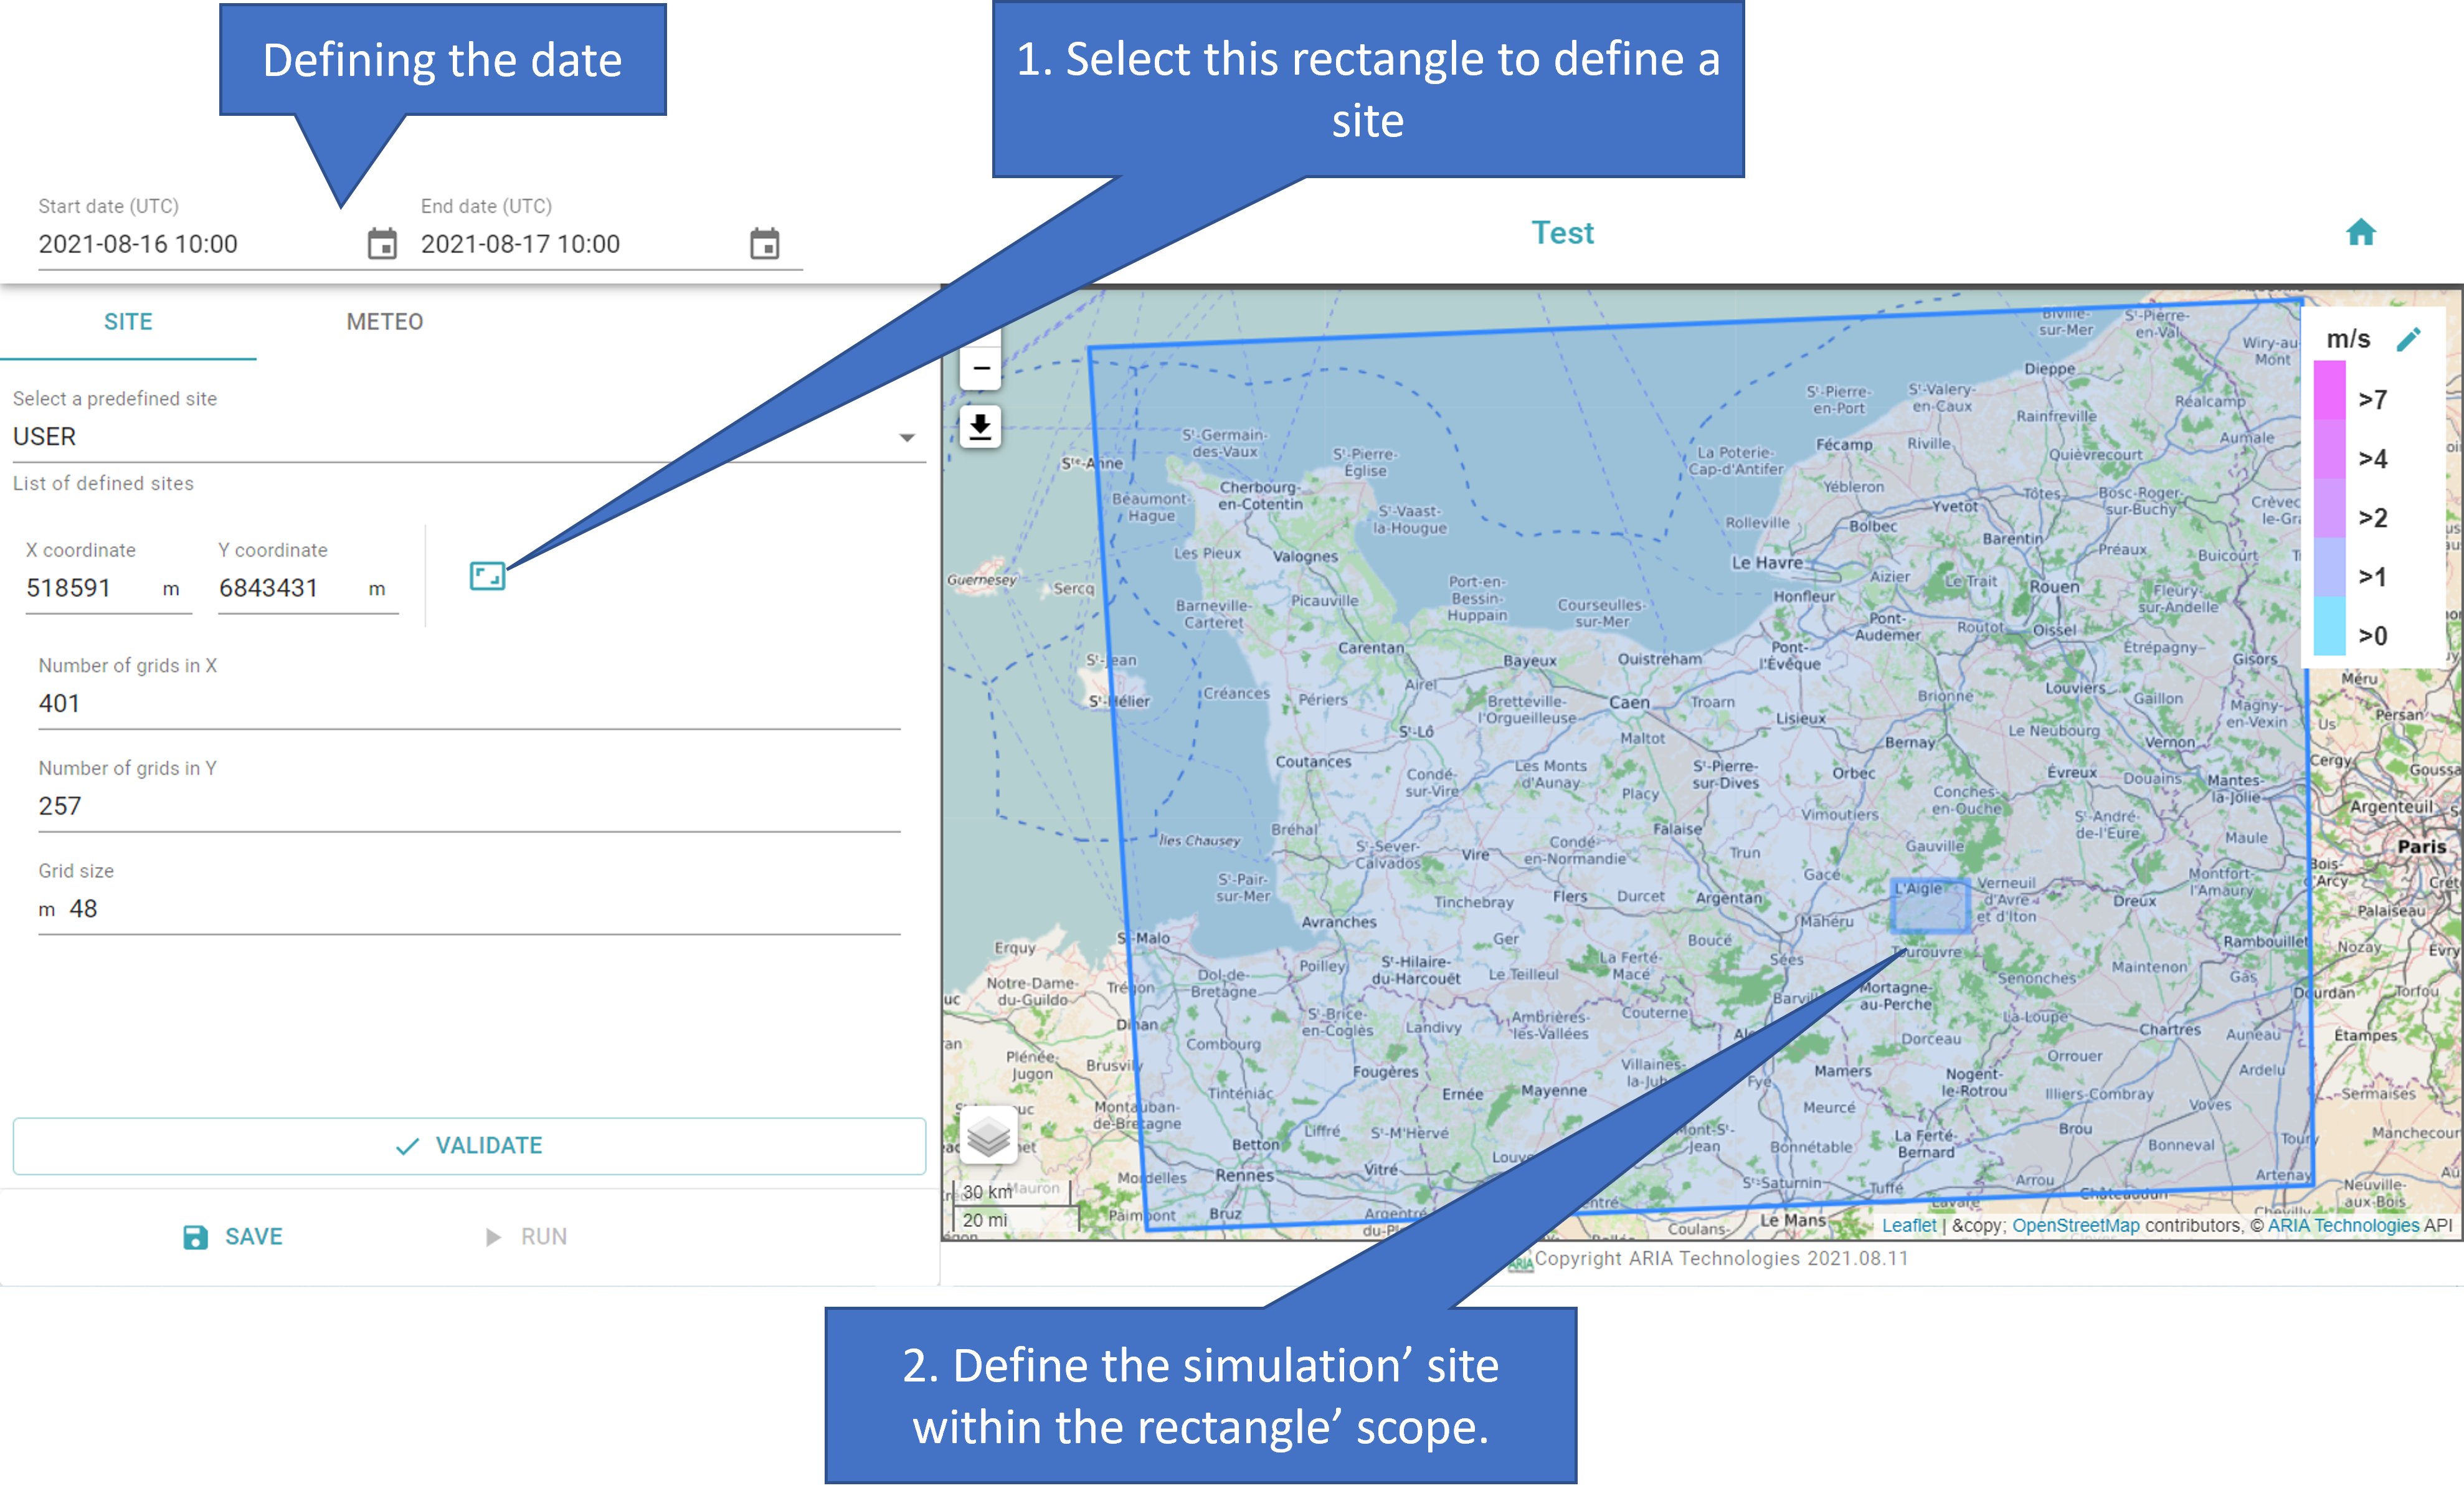
Configuring the simulation: from defining a site to a time period for a simulation

Configuring the simulation: validating the site and saving a simulation
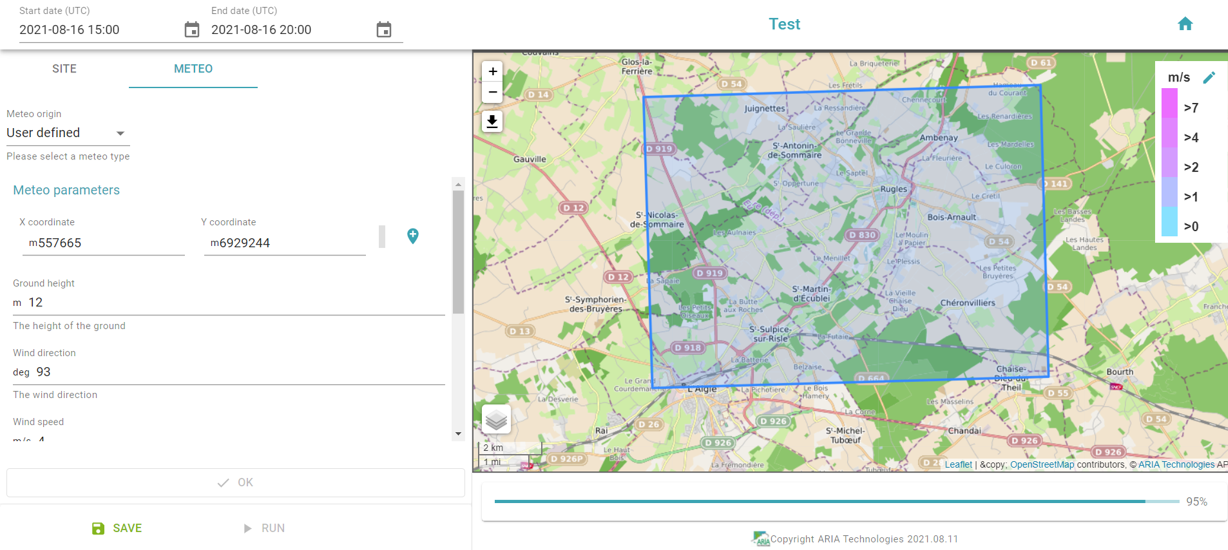
On the METEO tab, select one of the three meteo types, detailed below:
User defined mode (called Academic Meteorological Modelling).
From Meteorological Stations (called Meteorological Modelling from Observation Stations).
From Large Scale Model (called Meteorological Modelling from Large Scale Modelling).
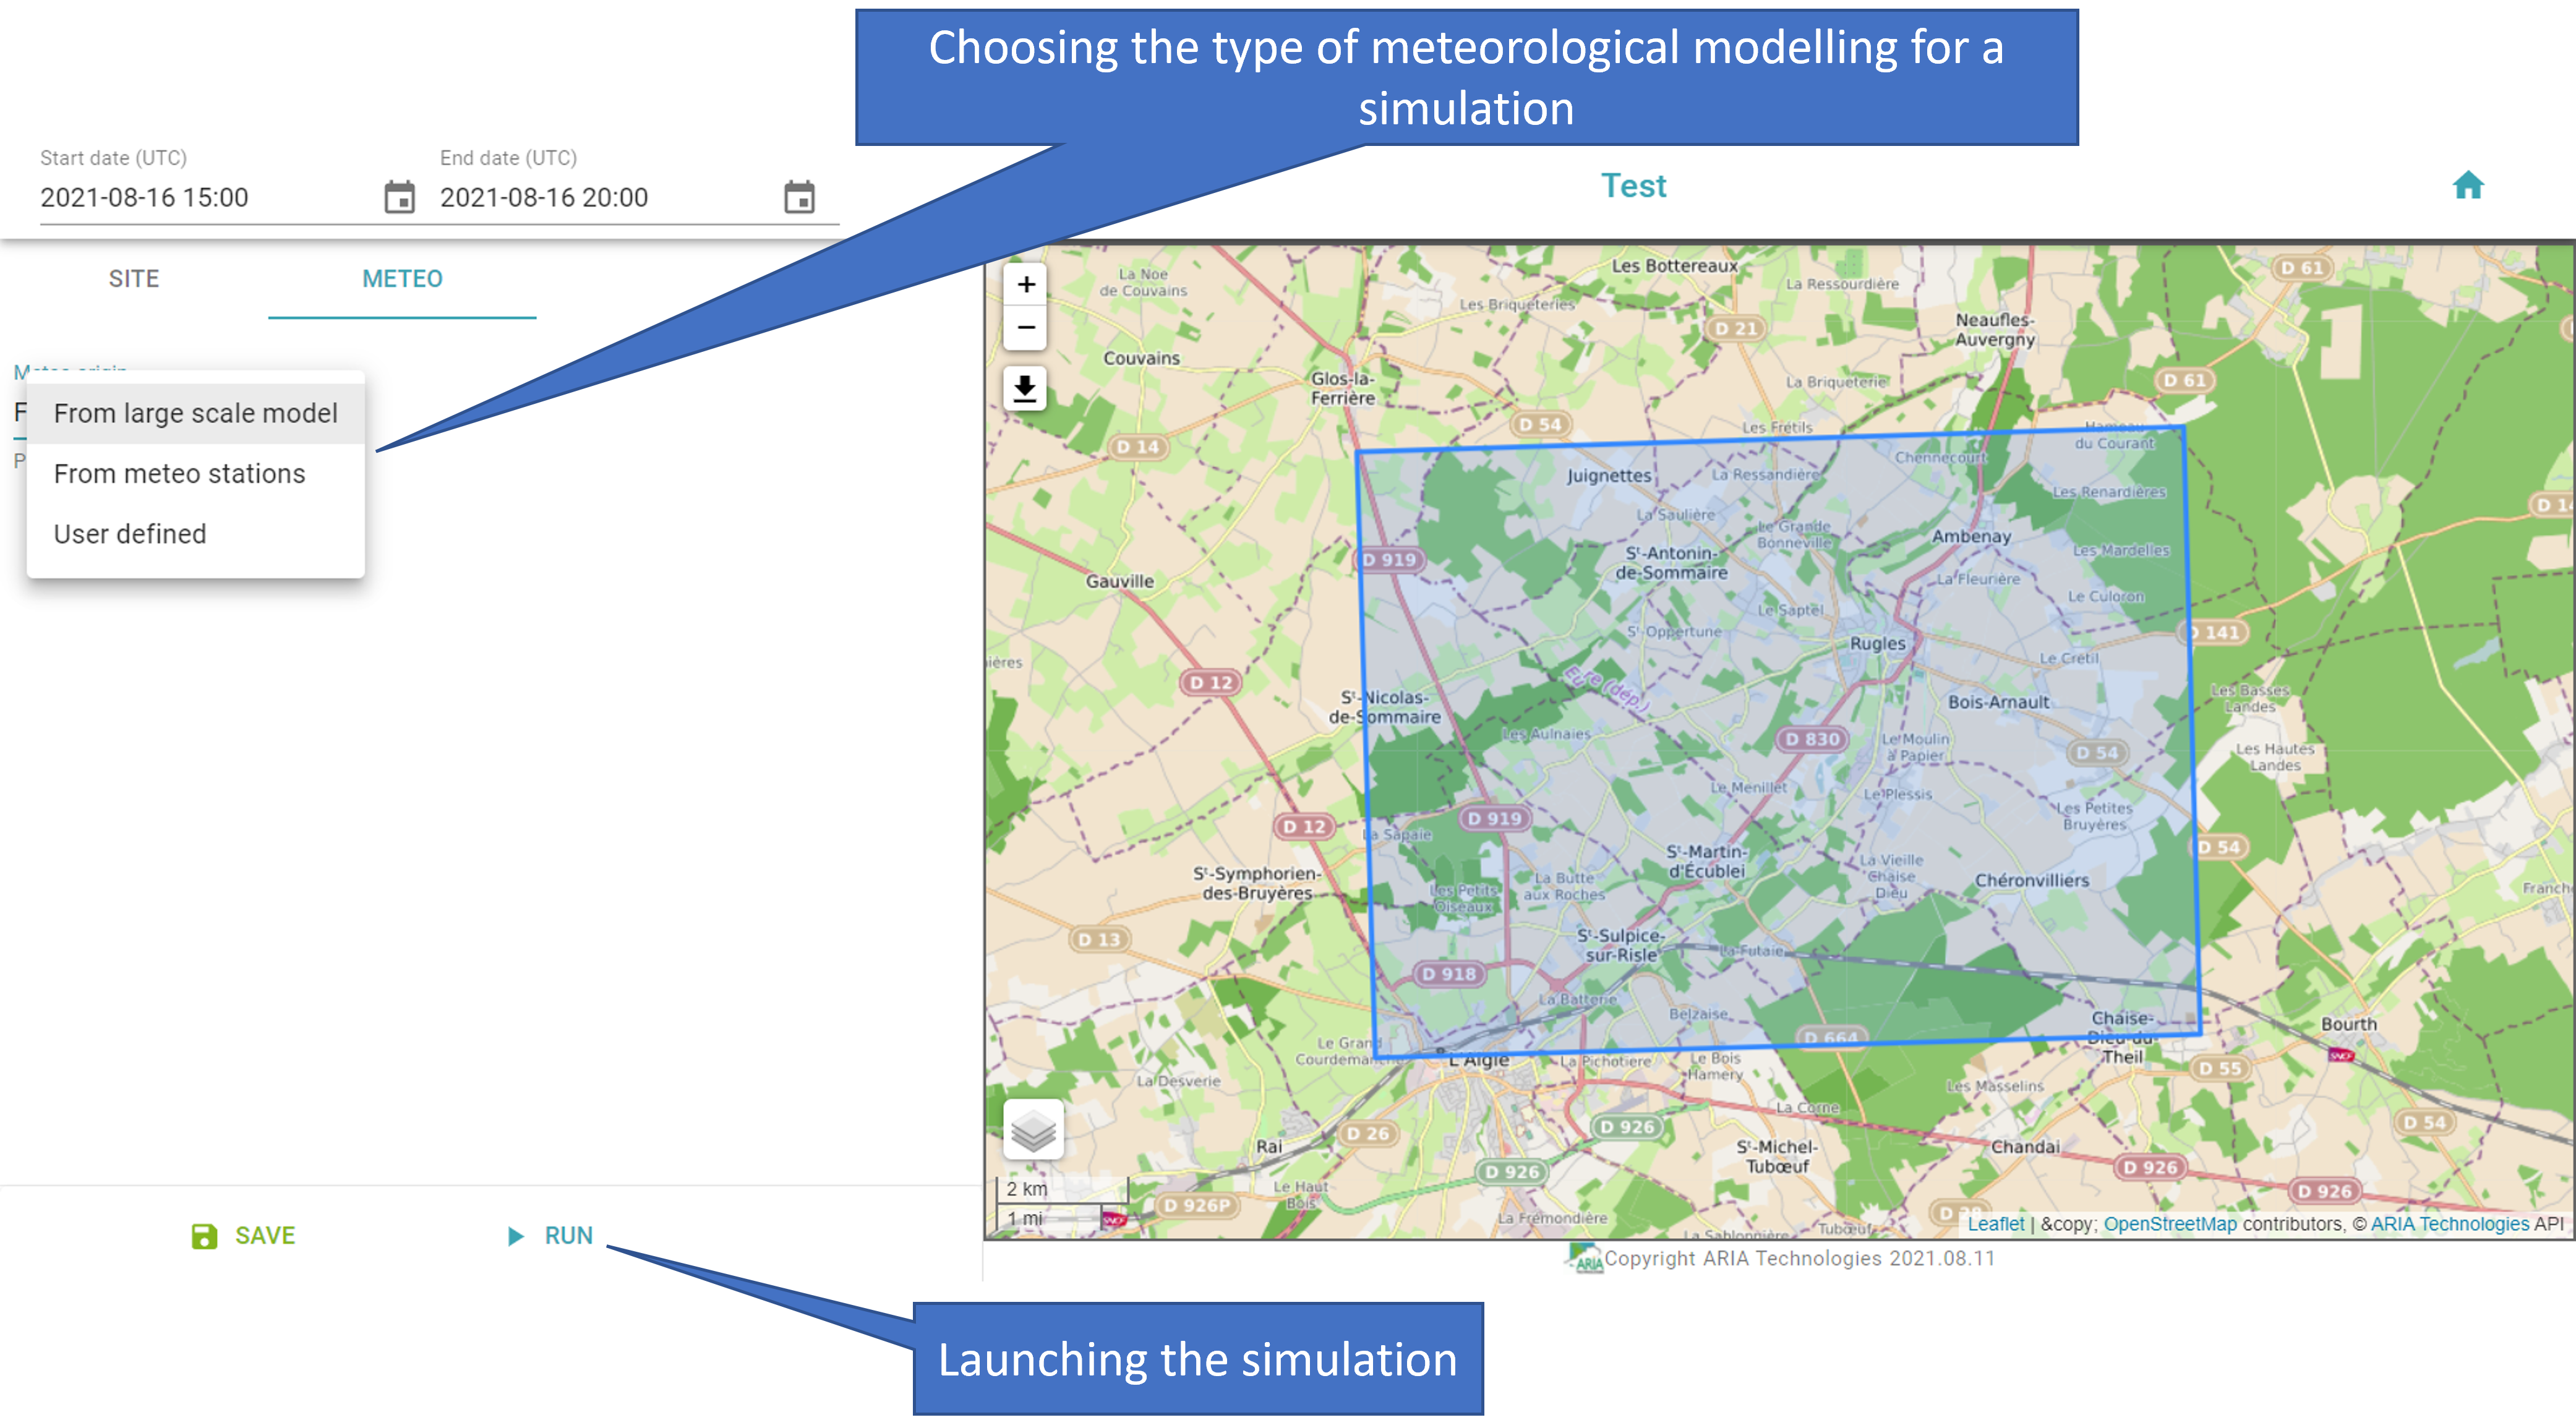
Configuring a simulation: choosing the meteorological type and launching a simulation.
To save your simulation, click on the SAVE symbol on the bottom left of your screen. To launch the scenario, click on the RUN symbol.
Academic meteorological modelling
Academic meteorological modelling is called User defined, and you define some meteorological parameters before launching the simulation.
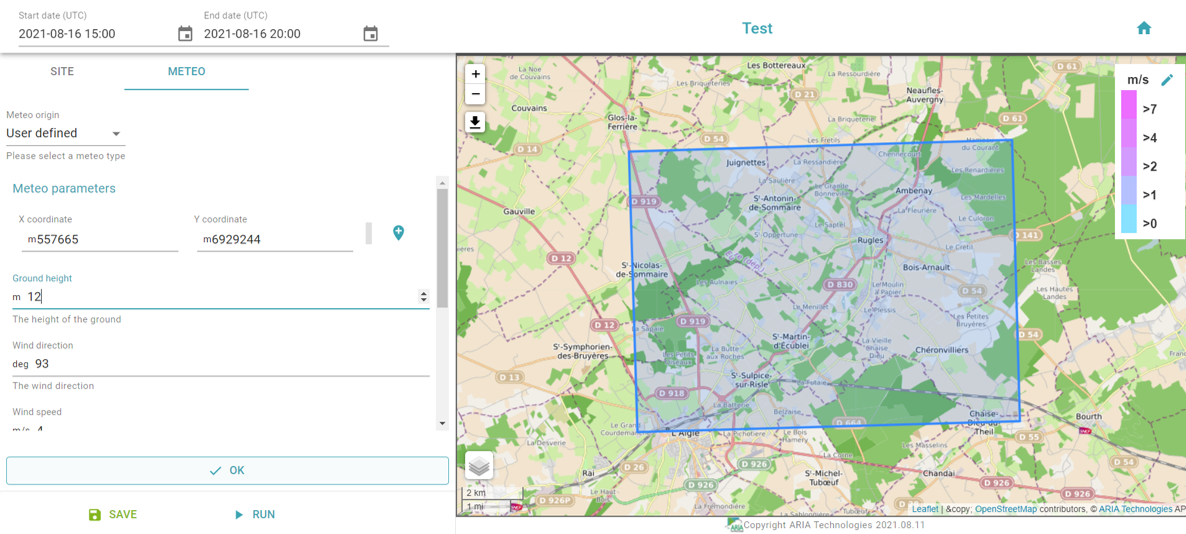
Configuring the academic meteorological modelling’s type
Once you have defined the parameters, validate your choices by clicking on the OK symbol. Again, you can save the simulation, and/or launch the simulation. Then, a green rectangle will inform you whether or not your simulation has been successfully launched.
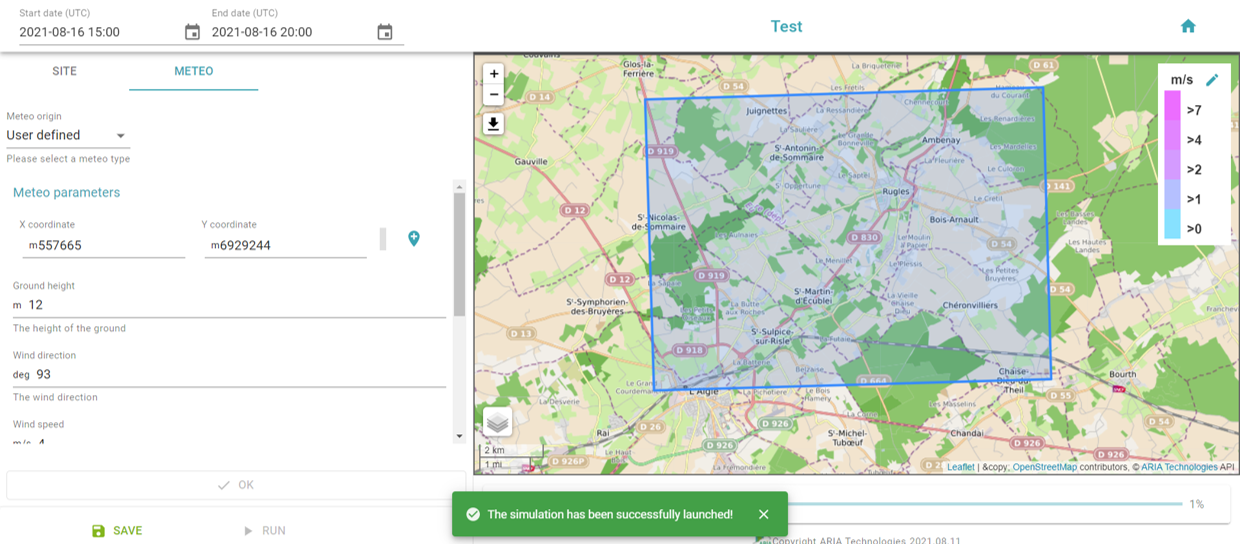
A message informing on the success of the launching of a simulation.
Make sure to allow some time for simulation uploading
Uploading a successful simulation
When you get your simulation, you are able to have a closer look at its evolution. You can choose whether to allow the representation of wind within your simulation perimeter, pause the simulation, or select a specific time on the simulation’s timeline.
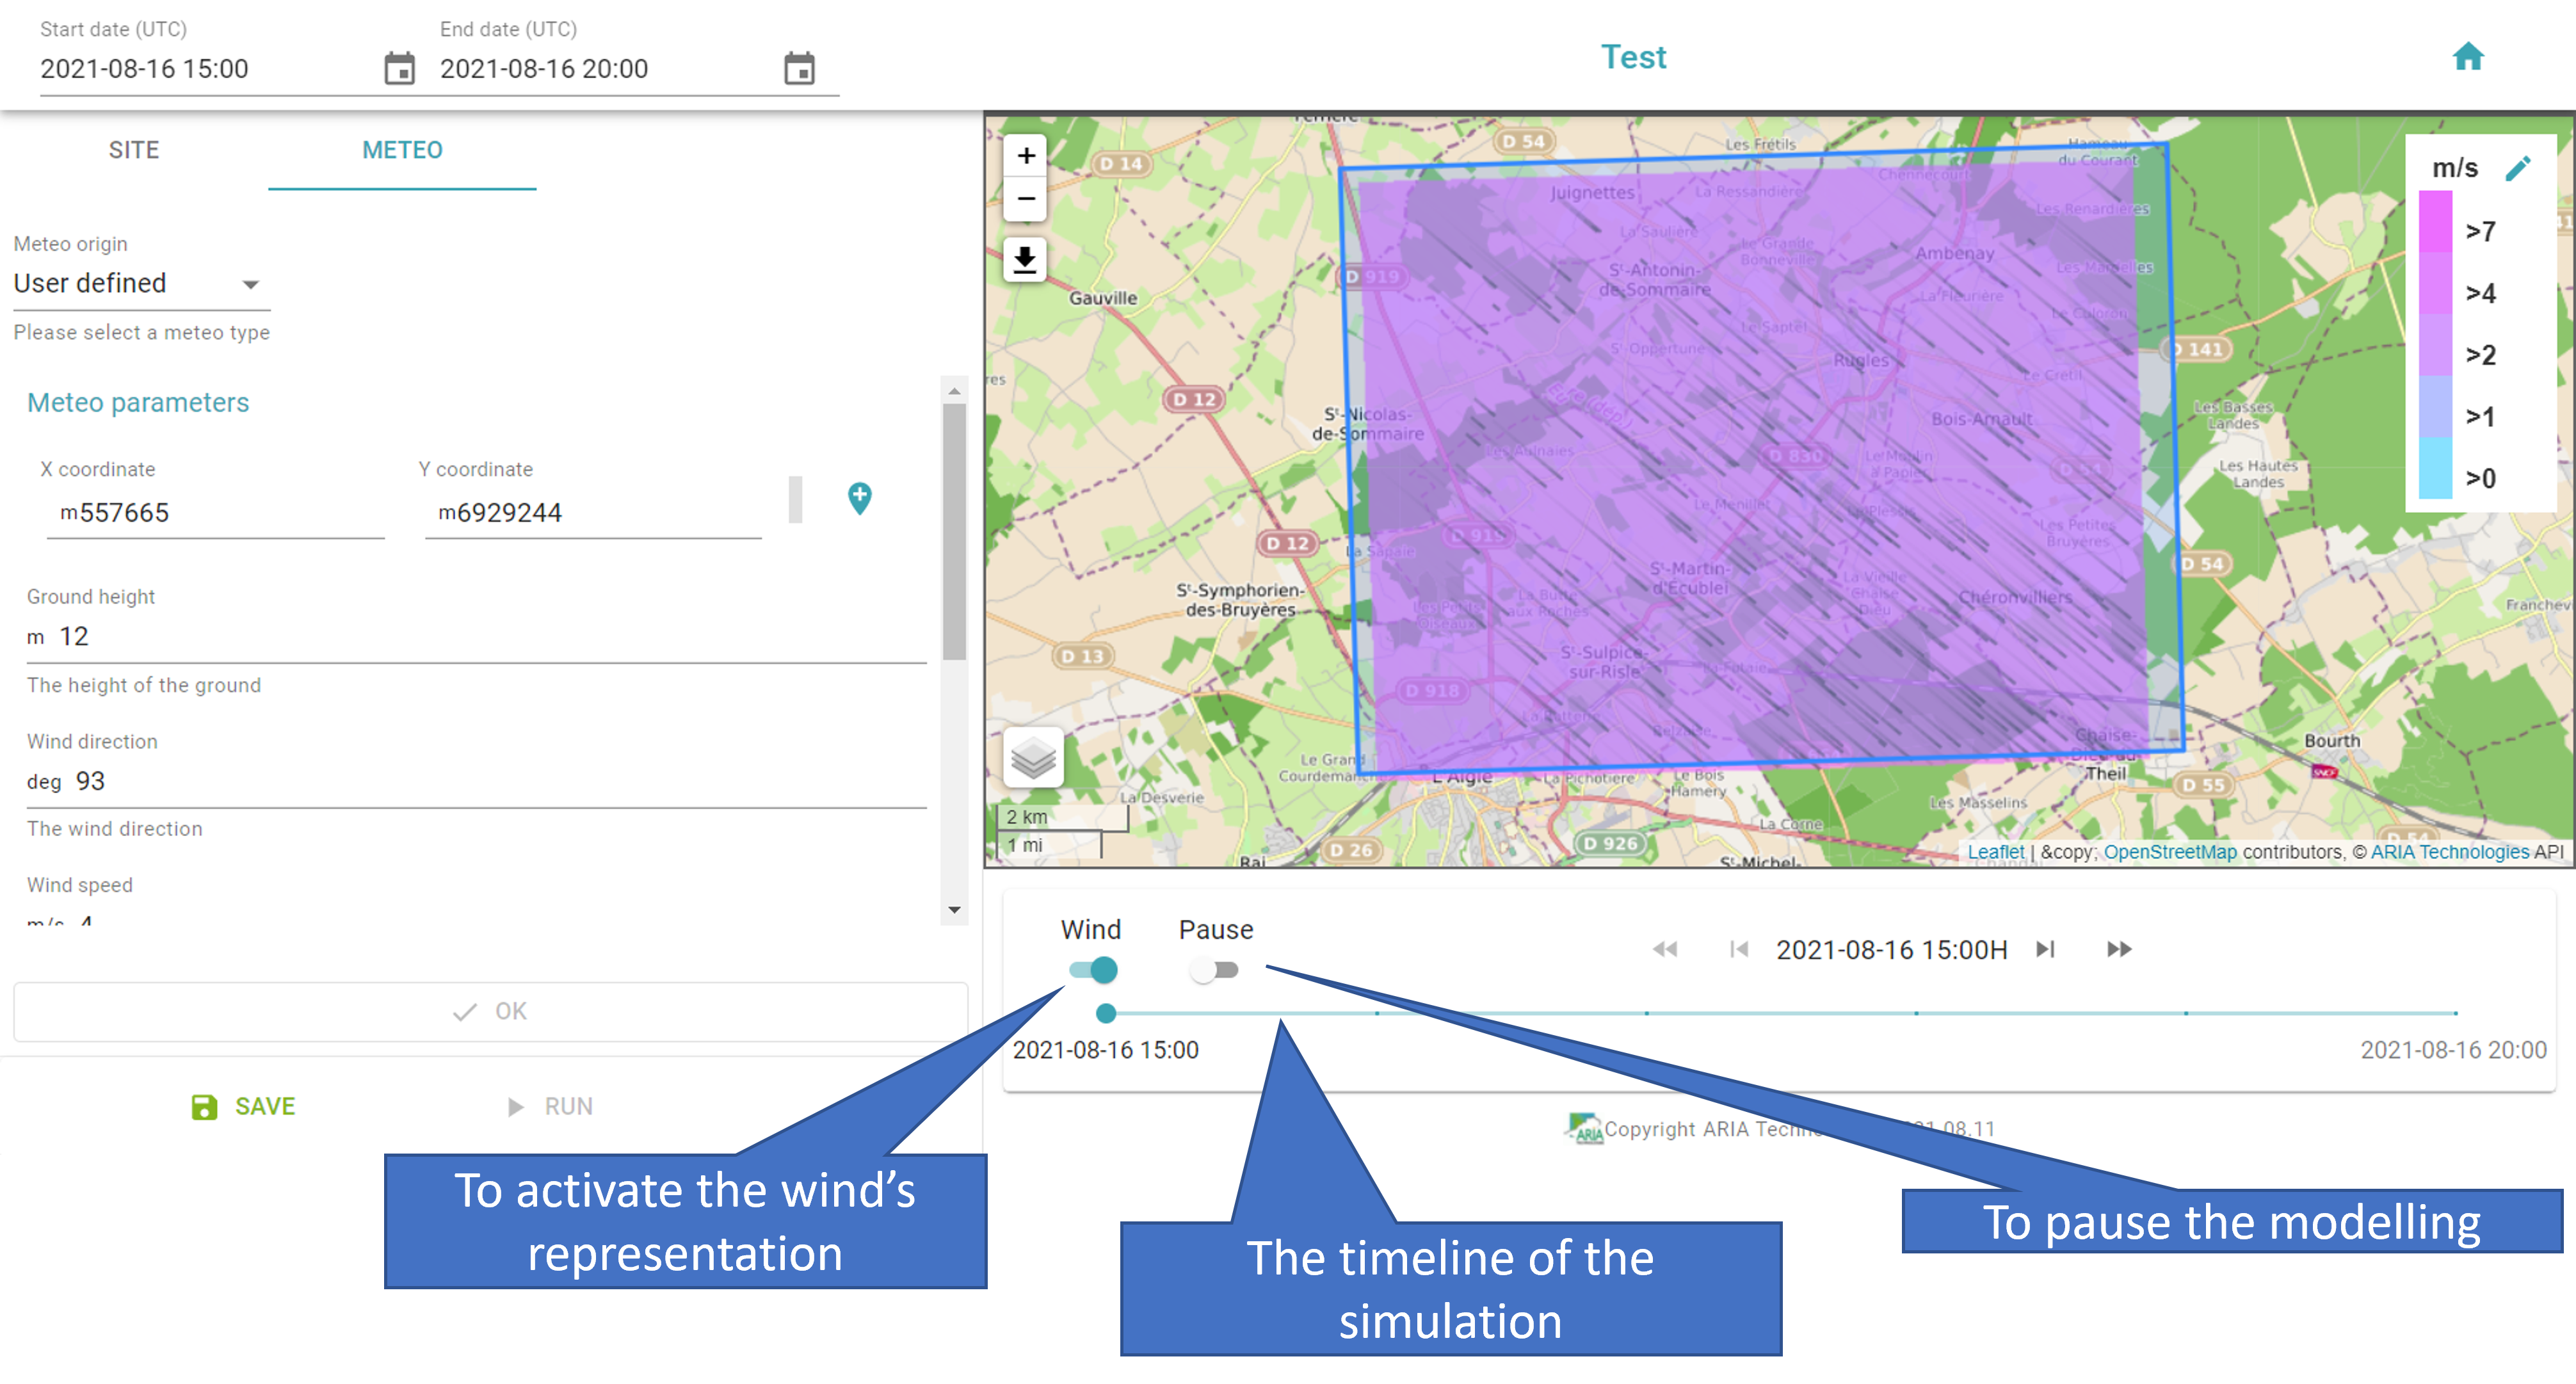
Studying the simulation
Meteorological modelling from observation stations
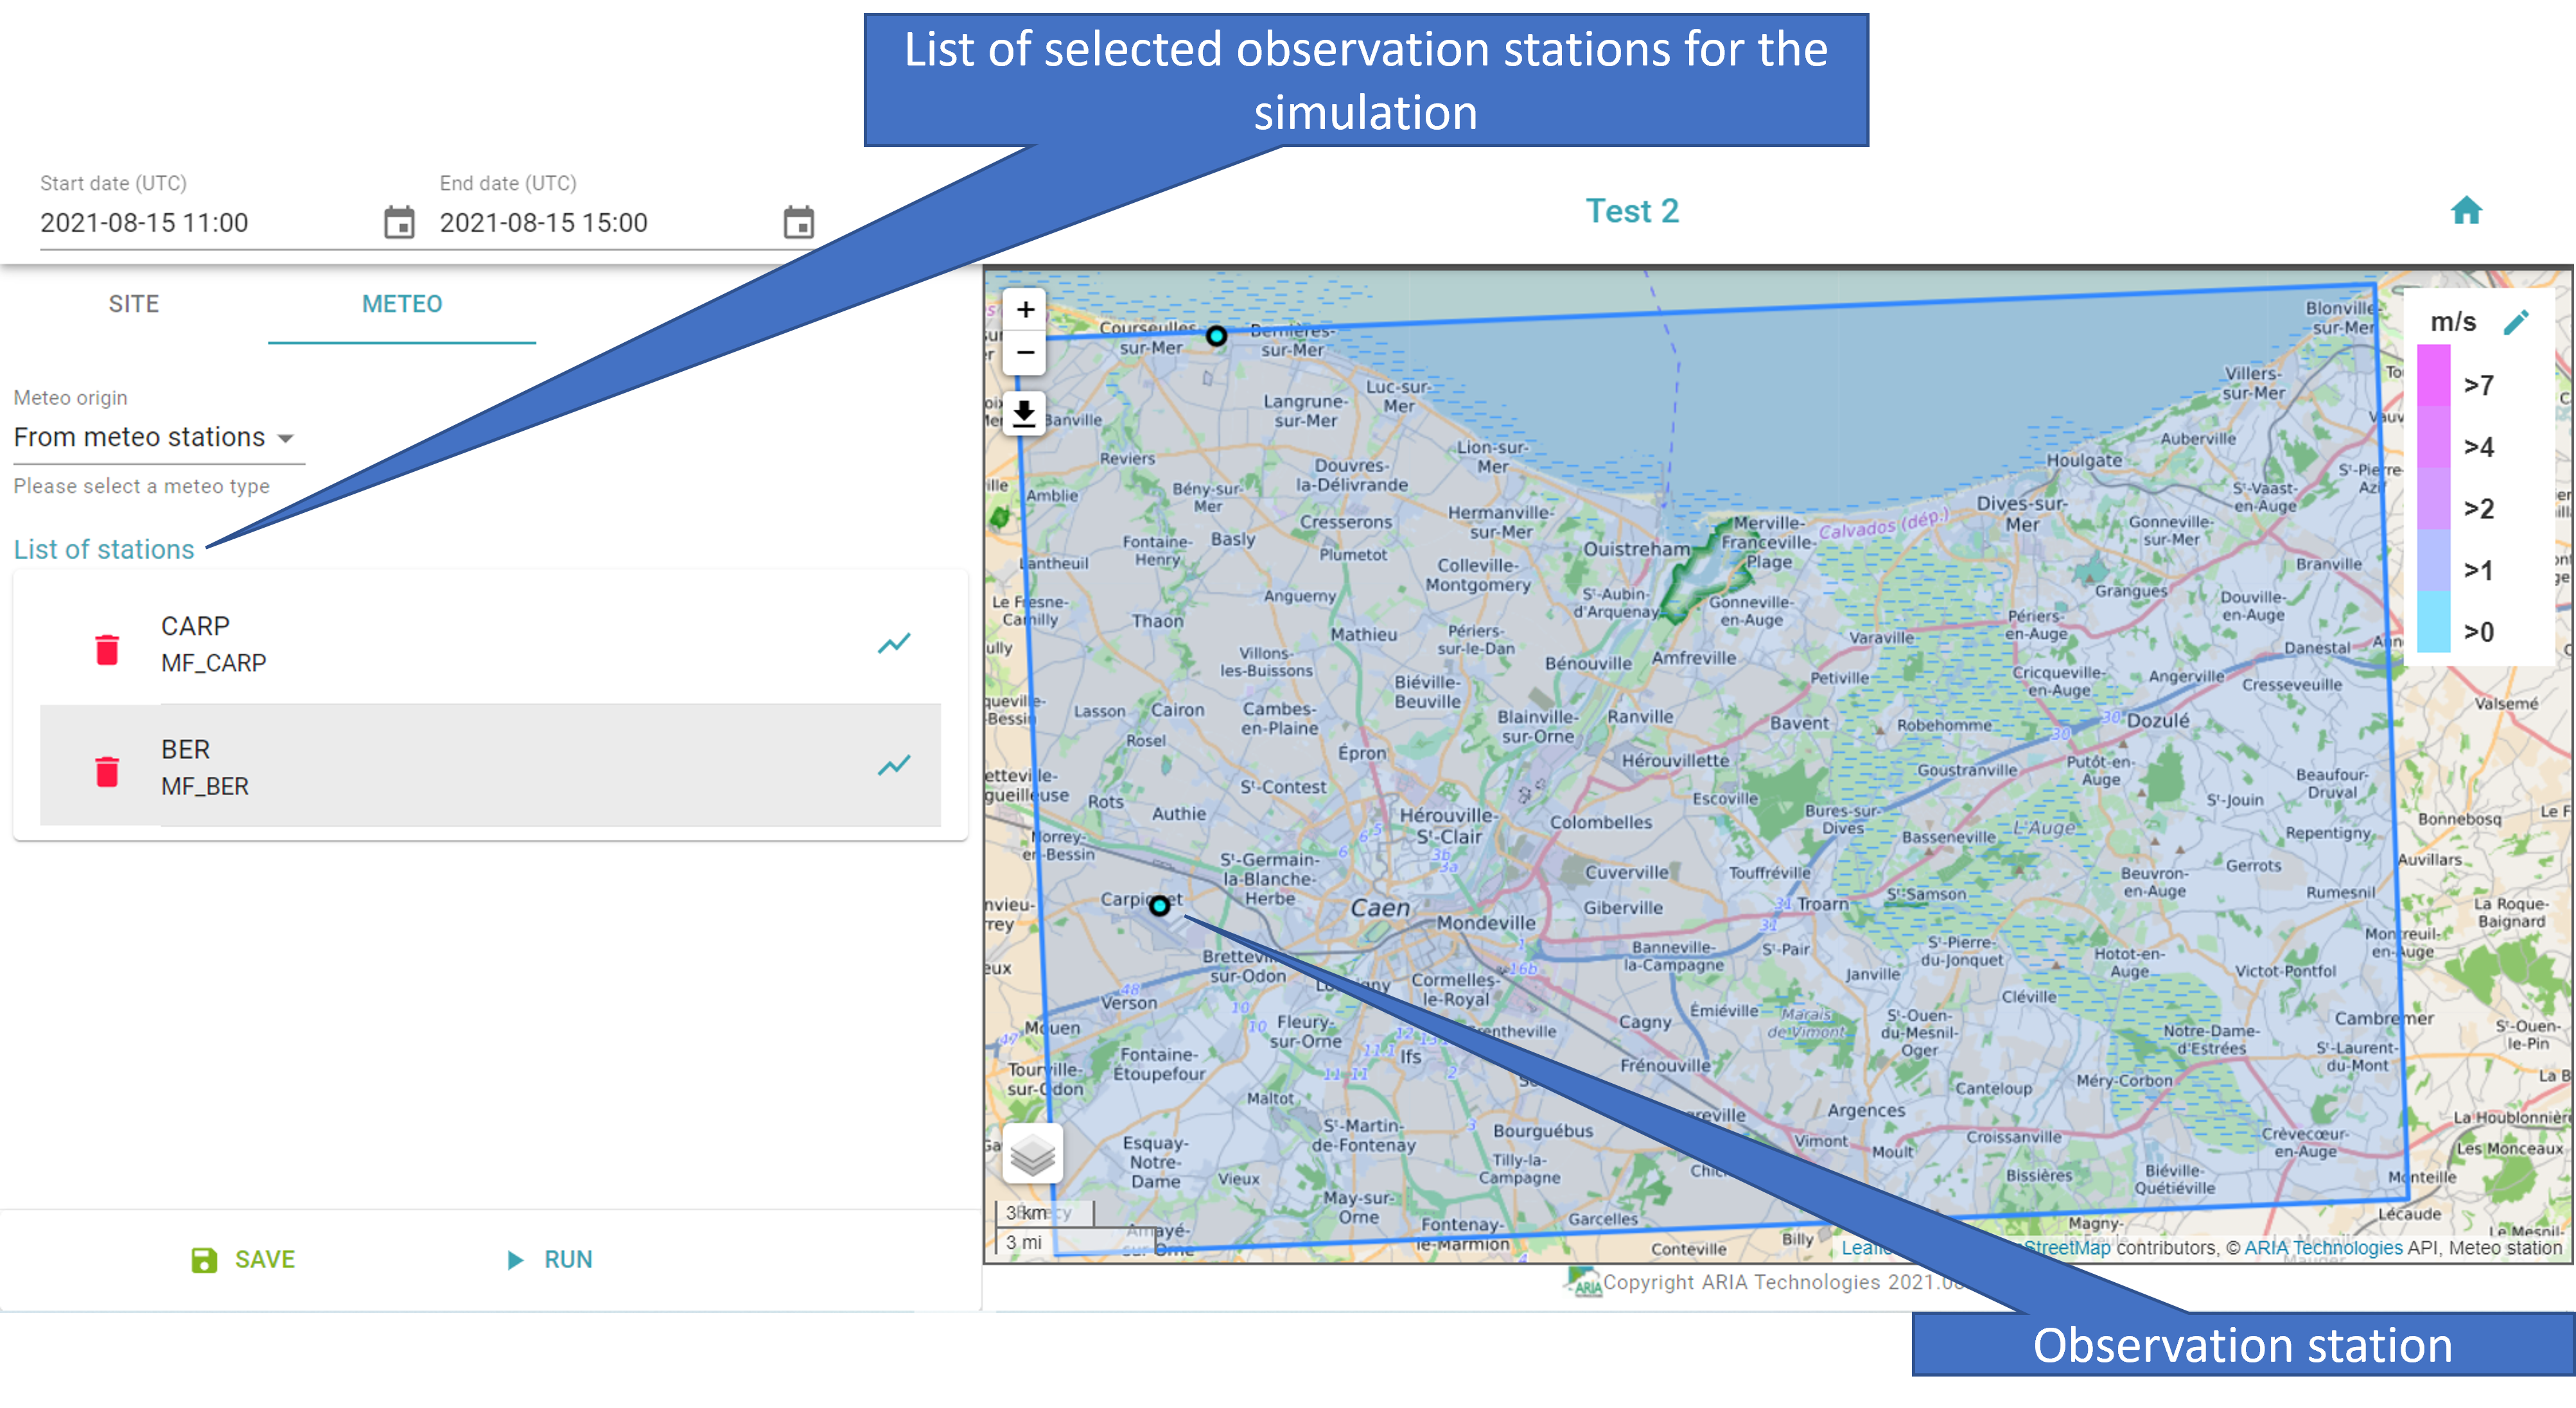
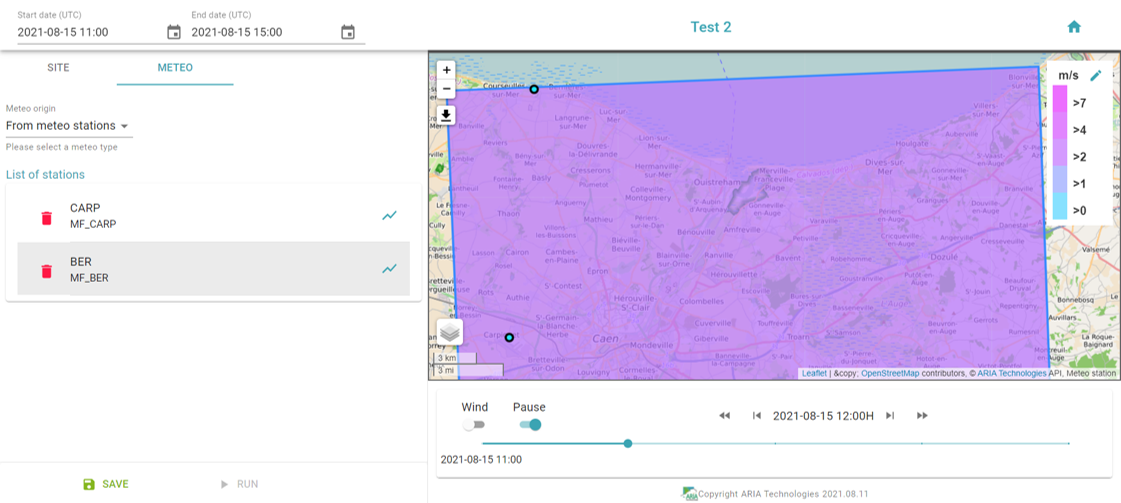
For this mode, called From meteo stations, you can select an already configured scenario or create a new one. On the METEO part, select the observation stations that will be included in the simulation. Observation stations are represented on the map by blue circles.
Important
Because observations are used as inputs, the modeled period must necessarily be past.
Configuring a simulation for meteorological modelling from observation stations’ type.
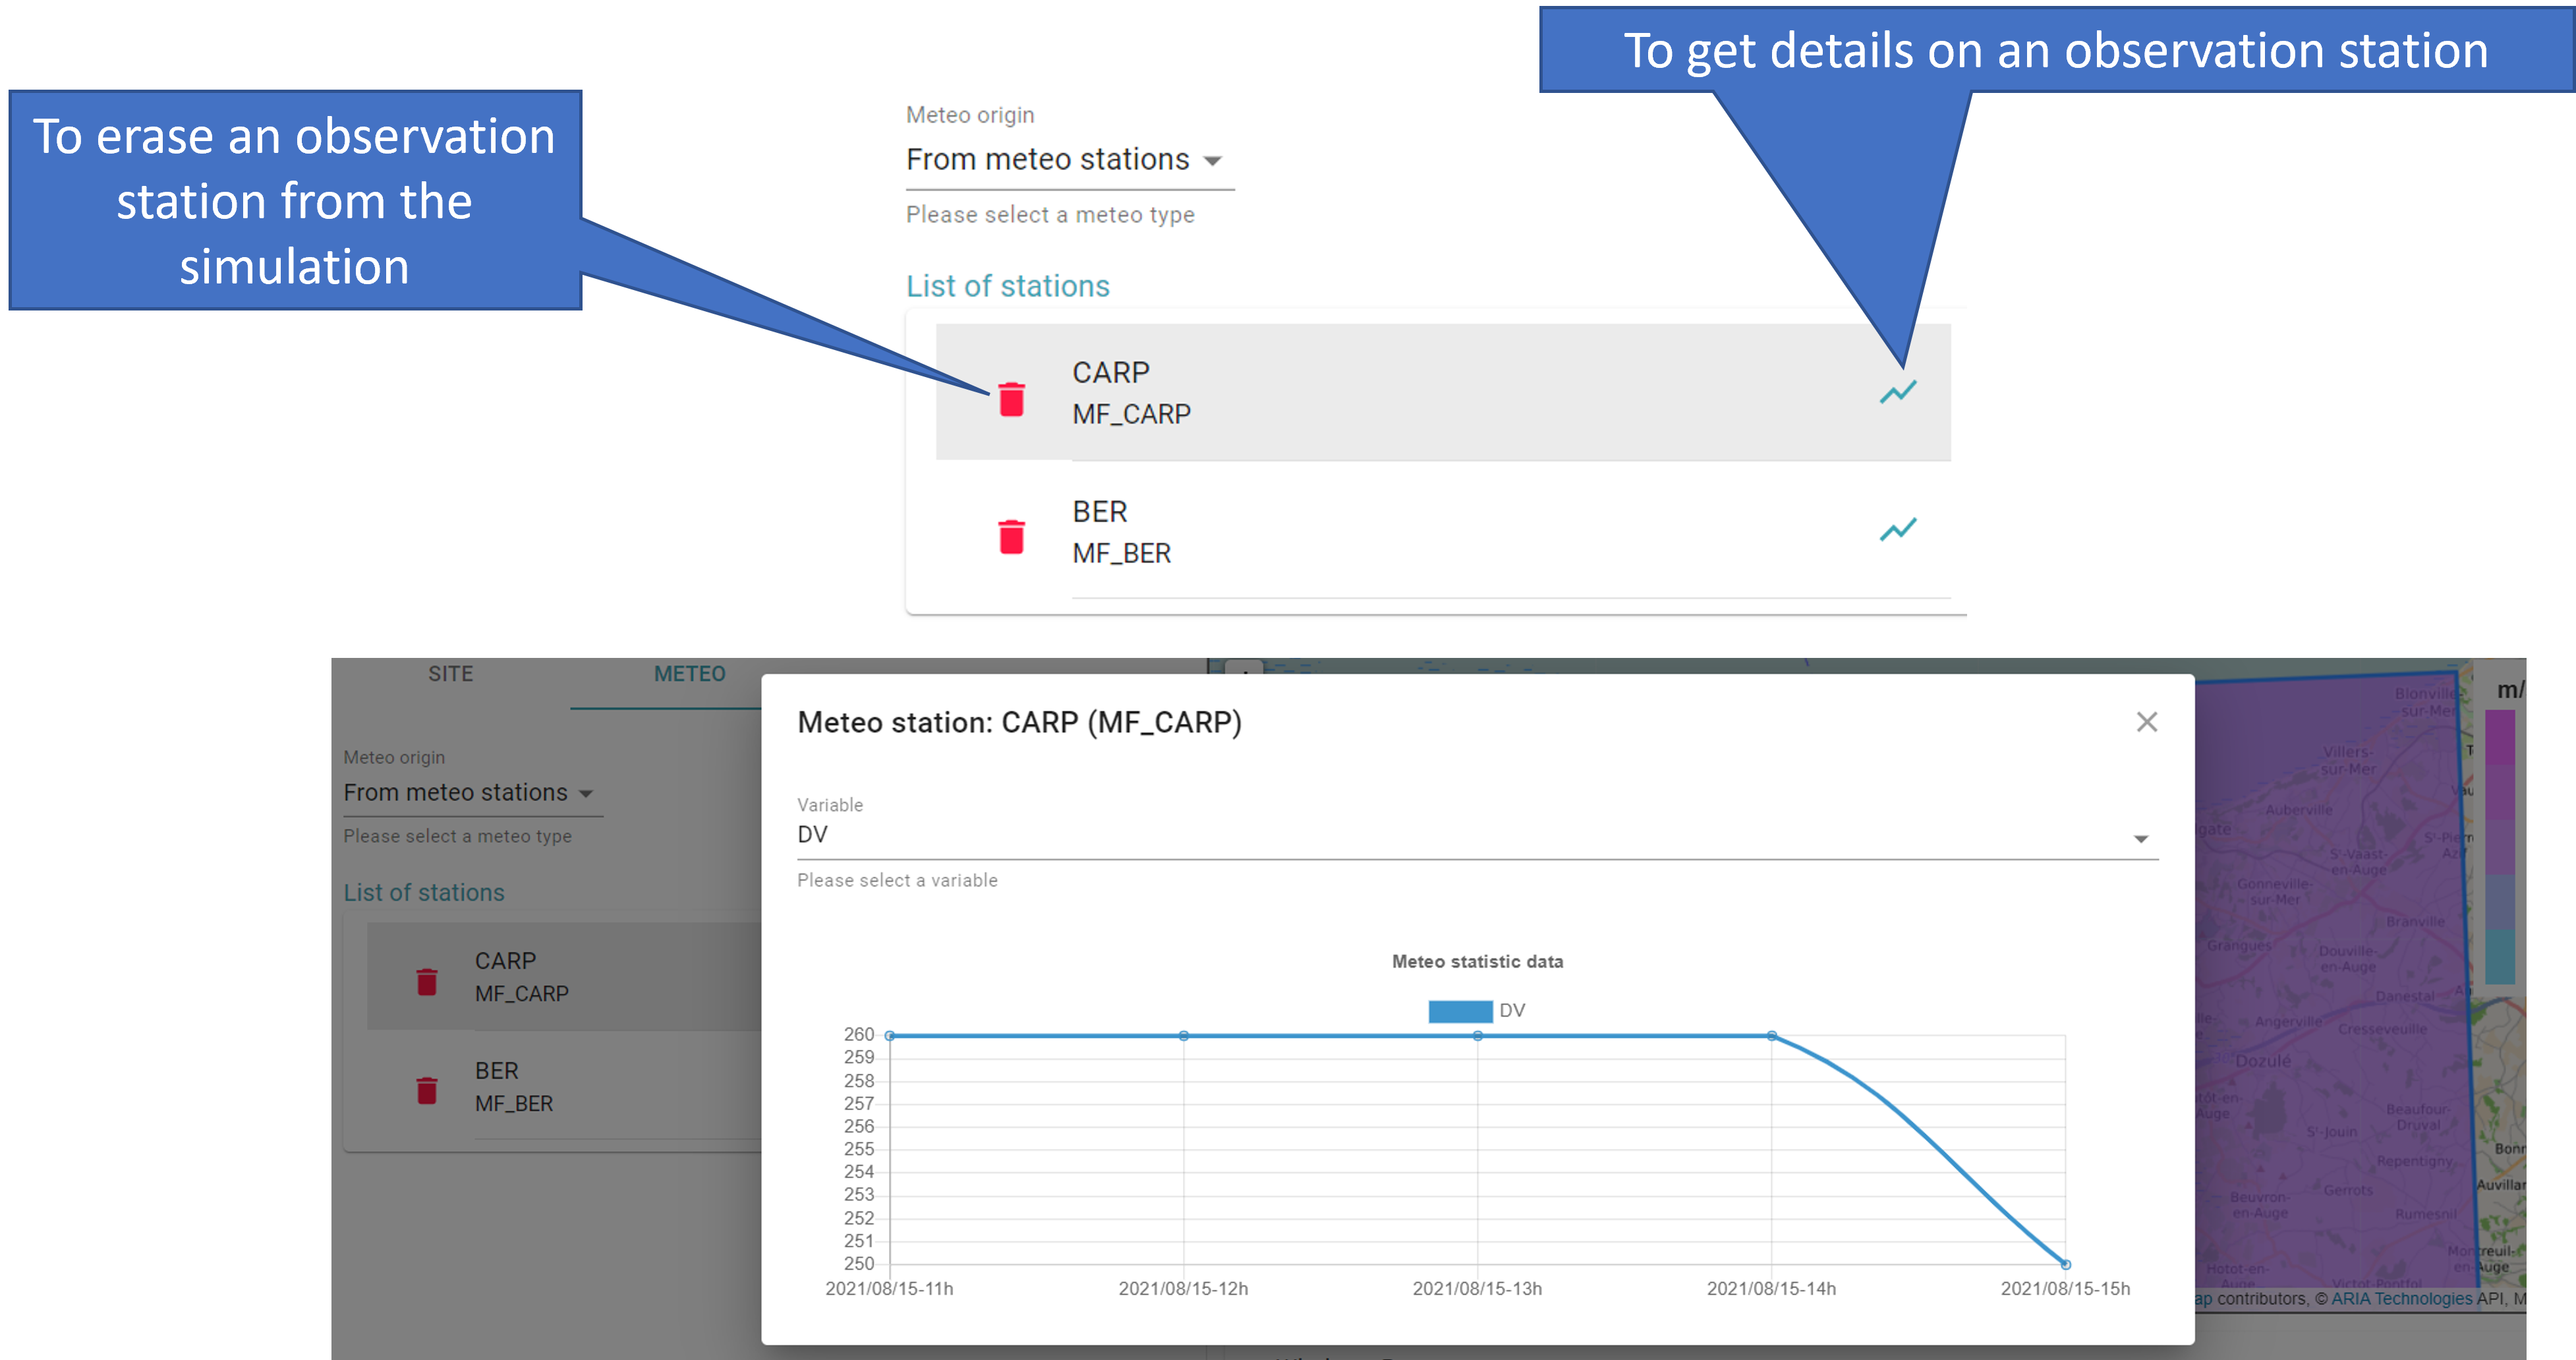
By clicking on the graph symbol near the name of the observation station, you are able to get details on the selected station. You can also erase a station from the simulation by cliking on the bin symbol.
On the observation stations
Then, you can save and launch your simulation by clicking on the SAVE symbol and the RUN symbol. If the simulation has been successfully launched, a green rectangle will appear at the bottom of your screen while the simulation is being calculated. Once it is calculated, you are able to get a closer look at its evolution, by allowing the representation of wind or choosing a specific time on the timeline. You can also pause the simulation.
Studying the simulation
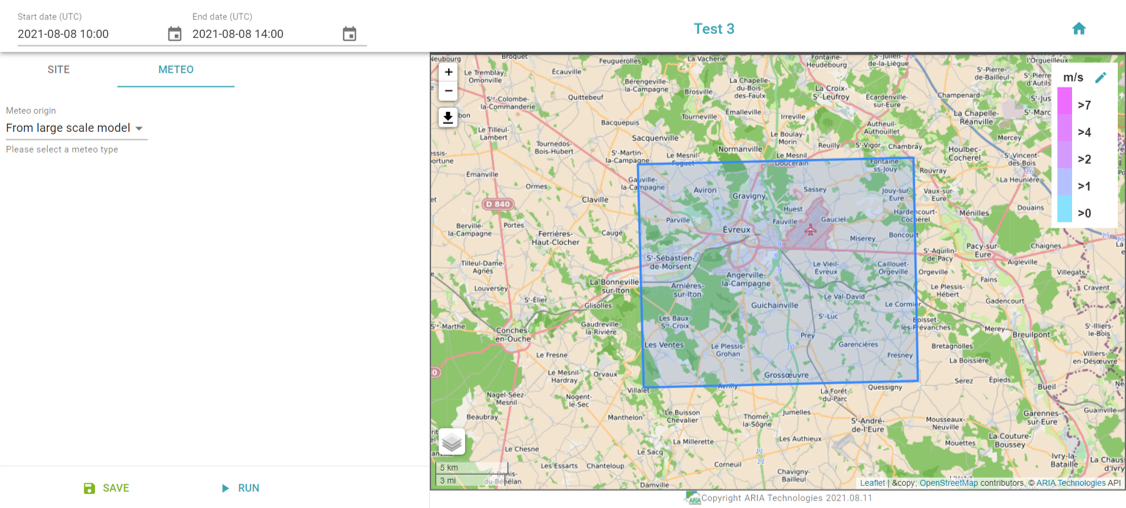
Meteorological modelling from a large scale modelling
For this modelling type, called From large scale model, define your simulation’s site and time-period (or select a previously configured simulation).
Configuring the meteorological modelling from a large scale modelling
Then, you can save and launch your simulation, by clicking on the SAVE symbol and the RUN symbol. If the simulation has been successfully launched, a green rectangle will appear at the bottom of your screen while the simulation is being calculated. Once it is calculated, you are able to get a closer look at its evolution, by allowing the representation of wind or choosing a specific time on the timeline. You can also pause the simulation.
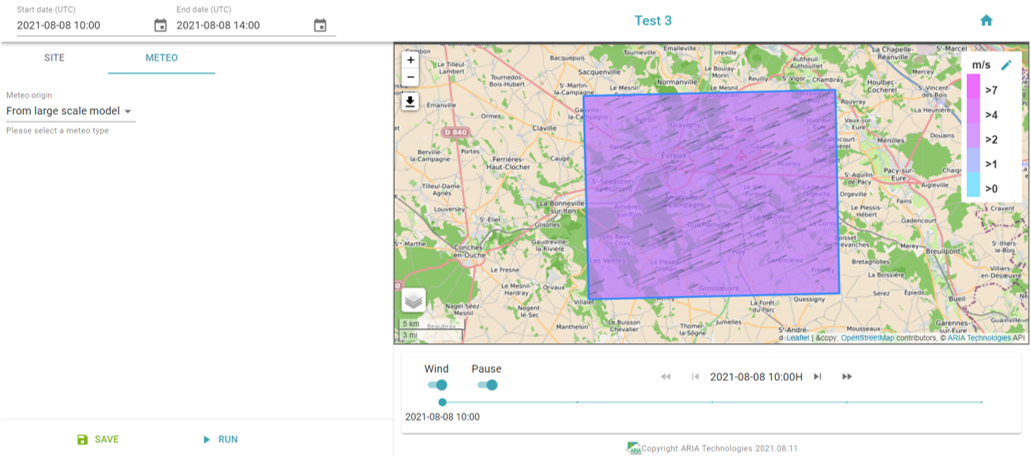
Studying the simulation